Deposit FIL into GLIF to earn rewards
This guide will show you how to deposit FIL into GLIF, so you can start earning rewards with GLIF.
Step 1: Prepare a wallet with FIL on it
To deposit FIL to GLIF, you first need to choose a wallet that supports FIL. GLIF is compatible with most EVM wallets. You can find more tutorials about wallets here. Make sure to do your own research (DYOR) to select the wallet.
In this tutorial we will use MetaMask, but you can find a similar tutorial using Ledger here.
IMPORTANT
No matter which wallet you use, always make sure to back up your secret recovery phrase, store it securely, and never share it with anyone. No one from the GLIF team will ever ask you for private keys or seed phrases.
Step 2: Connect your wallet to GLIF
- Visit the GLIF website and click on “Connect Wallet” in the top right corner.
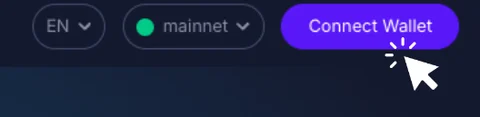
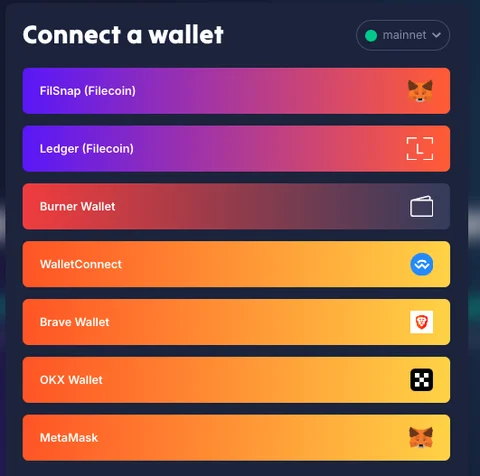
- Select the wallet you wish to connect with that is funded with FIL.
Step 2.5: Add the Filecoin network to your wallet (chrome extensions only)
After choosing a Chrome extension wallet (e.g., MetaMask) from the list of wallets, you may see a prompt in your wallet asking you to add the Filecoin network if this is your first time using it.
For detailed instructions on add the Filecoin Mainnet to your wallet, check out this tutorial.
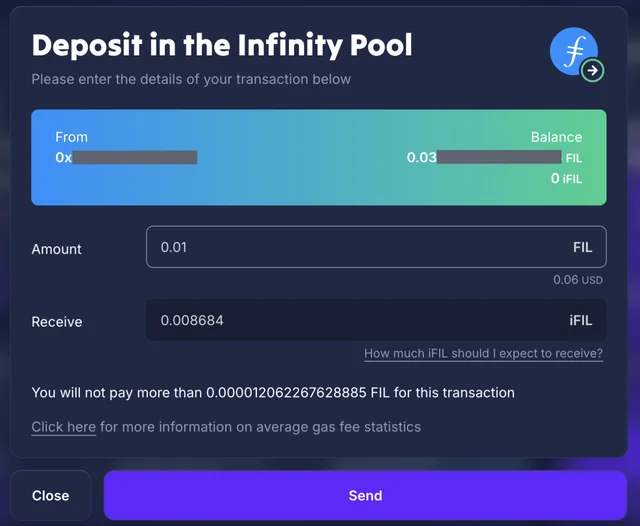
Step 3: Deposit your Filecoin with GLIF
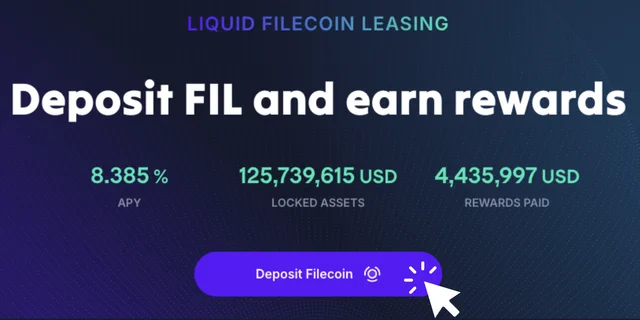
- After connecting your wallet to GLIF, your Filecoin balance will appear in the GLIF interface.
- Click “Deposit Filecoin” in the main page, or go to the “Pool” page.
- Enter the amount you wish to deposit, and click “Deposit”.
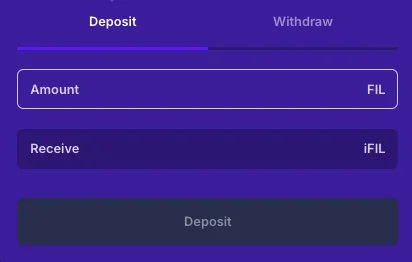
- Then hit “Send”.
WARNING
Please make sure that you leave enough FIL in the wallet to cover gas fees.
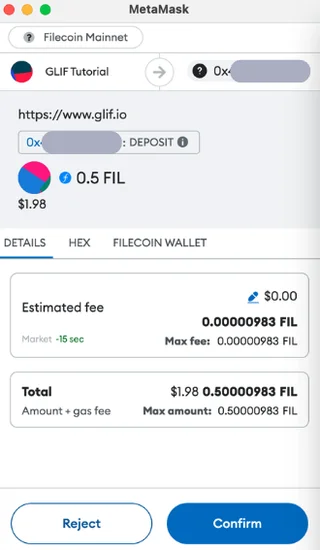
- Click “Confirm” in your wallet.
Step 4: Check your iFIL balance
After depositing FIL, you will receive iFIL within a minute or two. The FIL value of your iFIL represents your initial deposit plus any earned rewards.
NOTE
For more information on iFIL, check out our docs.
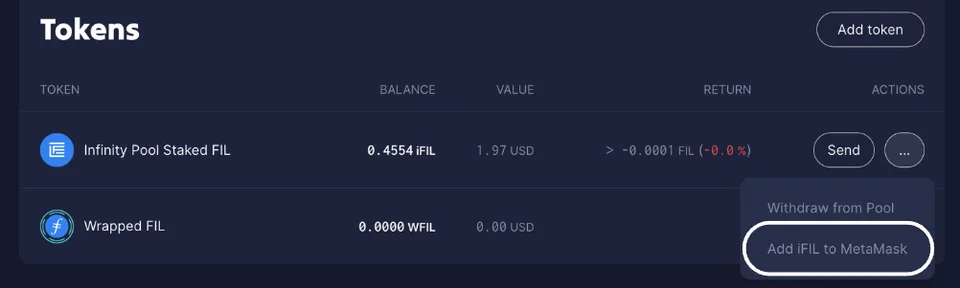
For a more detailed view of your position, click on “Wallet” in the GLIF navigation, and you will be able to see the FIL and iFIL associated with your wallet address in the “Token” section.

Step 5: Add iFIL to your wallet portfolio (chrome extensions only)
- If you want to see your iFIL in MetaMask, you can add the token address to your wallet easily. In “Token” section, find the “...” sign next to iFIL tokens, and click on “Add iFIL to MetaMask”.
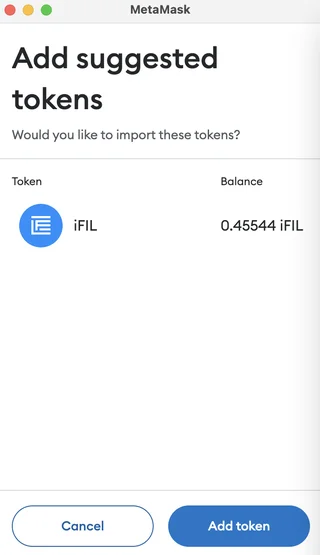
- Click “Add token” in MetaMask.
Conclusion
Congratulations on successfully depositing FIL to GLIF!
When you are ready to withdraw your deposit, you will need to return your iFIL to GLIF to receive your FIL back. For more details about the withdrawal process, check here.
Join our community!
- 📢 Stay informed with updates on our blog and X (Twitter)
- 🤝 Connect with us through Discord and Telegram for support and partnerships
- 💬 If you encounter any difficulties, please open a Discord support ticket
- ⚠️ Beware of scammers! GLIF team members have the role “GLIF” or “Moderator”