GLIF Agent Website Tutorial Part 2 — Create your Agent
If you don't yet understand the basics of GLIF Agents and the preparation steps to get started creating Agents on the GLIF website, we suggest you start by reading Part 1 of this tutorial. You can find all the tutorials about using Agents on the GLIF website on this page. You can find the instructions about the Agent's command on the GLIF Command Line Interface on this page.
Agents, Agent Owners, and Login Keys
Before creating your Agent on the website, it's important to understand 2 “roles” within GLIF. As a brief refresher:
- Agent — An Agent is a smart contract that borrows FIL from GLIF. You will deploy, own, and operate your Agent smart contract yourself (covered in this tutorial). In order to borrow FIL, your Agent needs collateral, which it gets by taking ownership of your Filecoin miner(s). A more detailed description of Agents can be found here.
- Agent owner wallet — The Agent's owner wallet is the wallet that controls your Agent. Whoever is in control of your Agent's owner wallet can operate your Agent. It is very important to keep the Agent's owner wallet secure, which GLIF will help you do automatically.
Agent Creation Wizard
In this tutorial, you will:
- Create your Agent Owner multisig wallet
- Create your Agent smart contract
The Agent Creation Wizard on the GLIF website will walk you through these steps. Read on for a guided walkthrough.
Create your Agent on the website
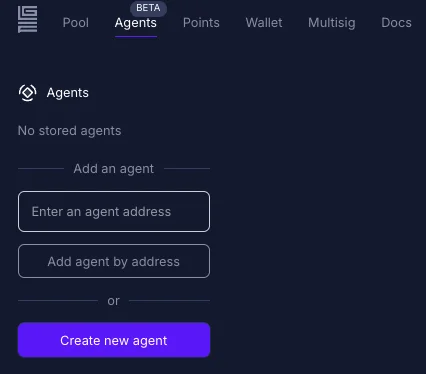
Step 1 — go to glif.io/agent and click the “Create new agent” button on the left hand panel:
Step 2 — Connect the “proposer” Filecoin Snap wallet you created in Part 1 of the tutorial.
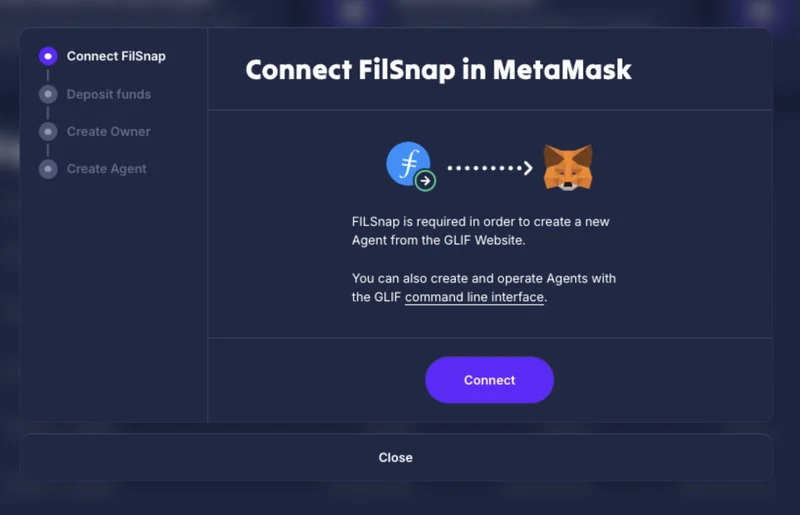
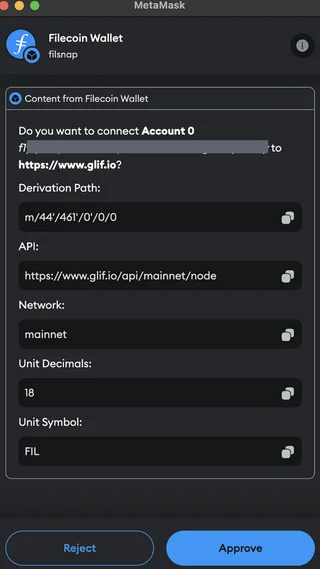
Once you click the “Connect” button, you must approve GLIF to connect to your wallet. You may see this popup appear two times, you should approve both requests to connect.
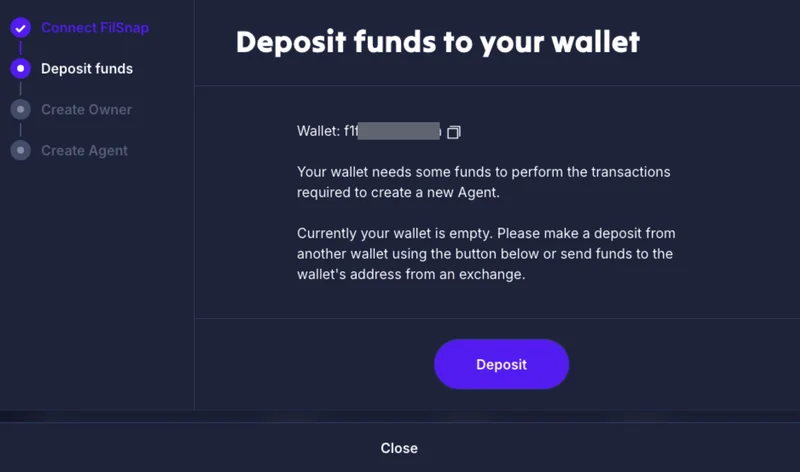
Your FilSnap wallet needs some funds to perform the transactions required to create a new Agent.
If your wallet is empty, please make a deposit from another wallet using the “Deposit” button, or send funds to the wallet's address from an exchange. If you encounter any issues with the deposit, check the tutorial here.
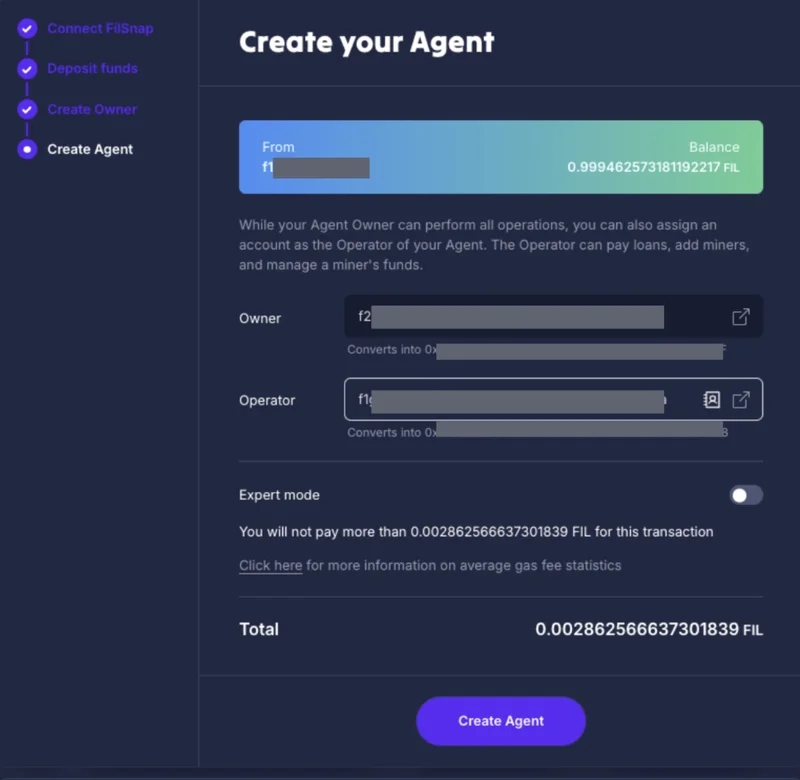
Step 3 — Enter your two additional wallet addresses (“approver”, “backup”) signers and create your Agent owner wallet. These are the two other FilSnap or Ledger wallet addresses you created in Part 1 of this tutorial.
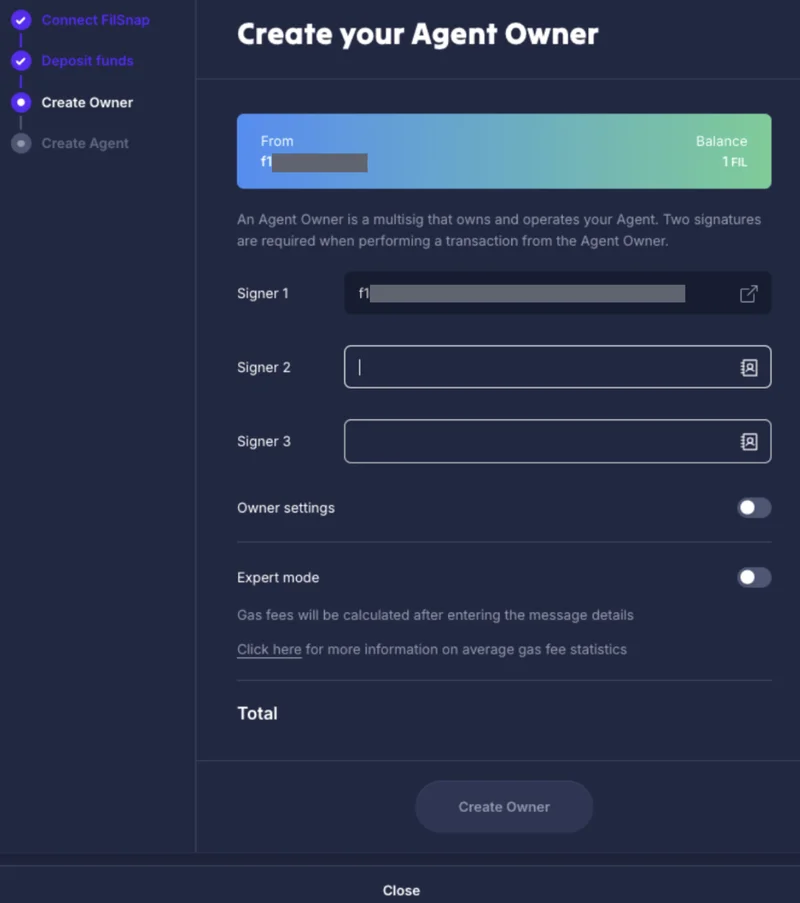
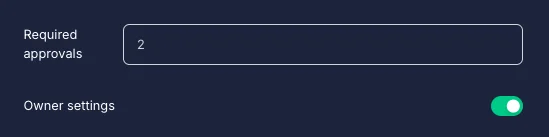
If you want to use 2 signers only, open the owner settings, set 'Required approvals' to 2, and remove the “Signer 3”.
Once you click “Create Owner”, you must approve the transaction in MetaMask:
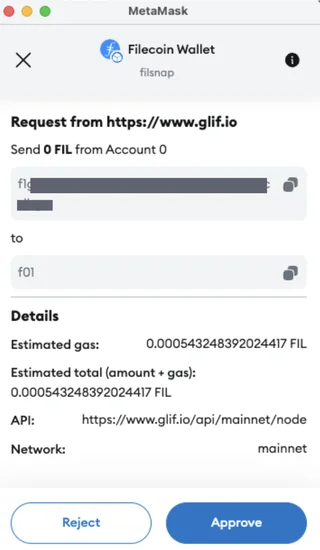
Great work so far! Once you've approved this Agent Owner multisig creation transaction, you're almost ready to create your Agent smart contract.
Step 4 — Wait for your Agent owner multisig creation transaction to complete.
In order to create your Agent, we must first wait for your Agent owner multisig wallet to exist on-chain.
NOTE
If you see “Failed to load address information” under your “owner address”, this is because your Agent owner multisig wallet creation transaction is still pending.
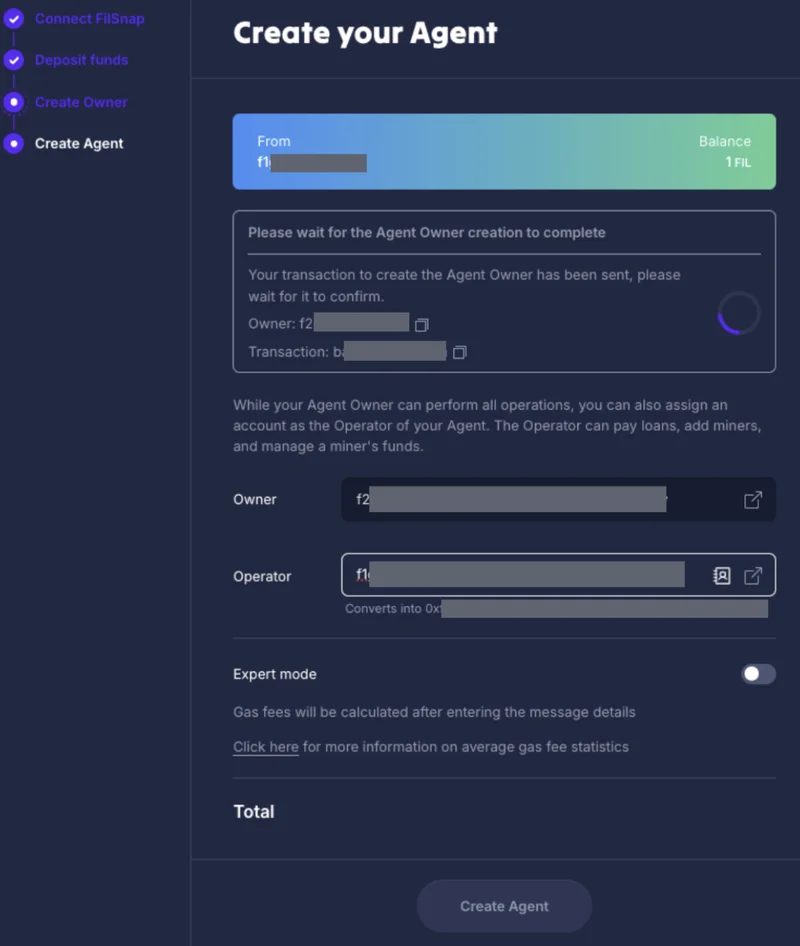
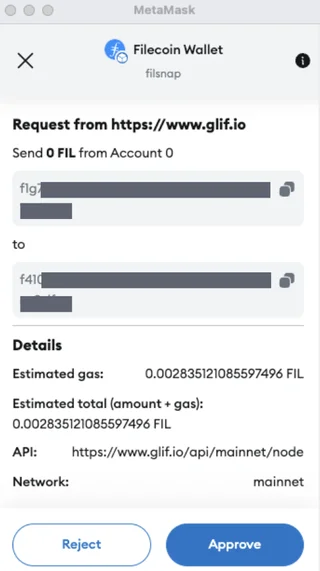
Once your Agent owner multisig creation transaction has confirmed, you should be able to click the “Create Agent” button, and approve the transaction in MetaMask.
Once you click the “Create Agent” button, you must approve the transaction in MetaMask:
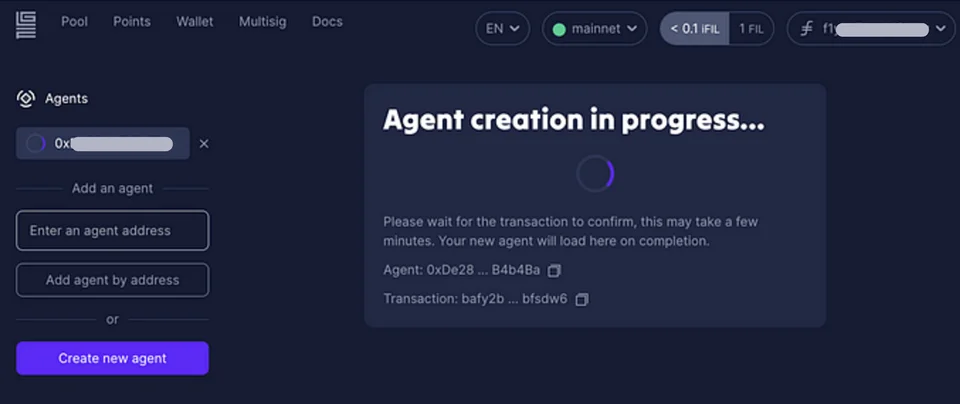
Step 5 — wait for your Agent creation transaction to confirm
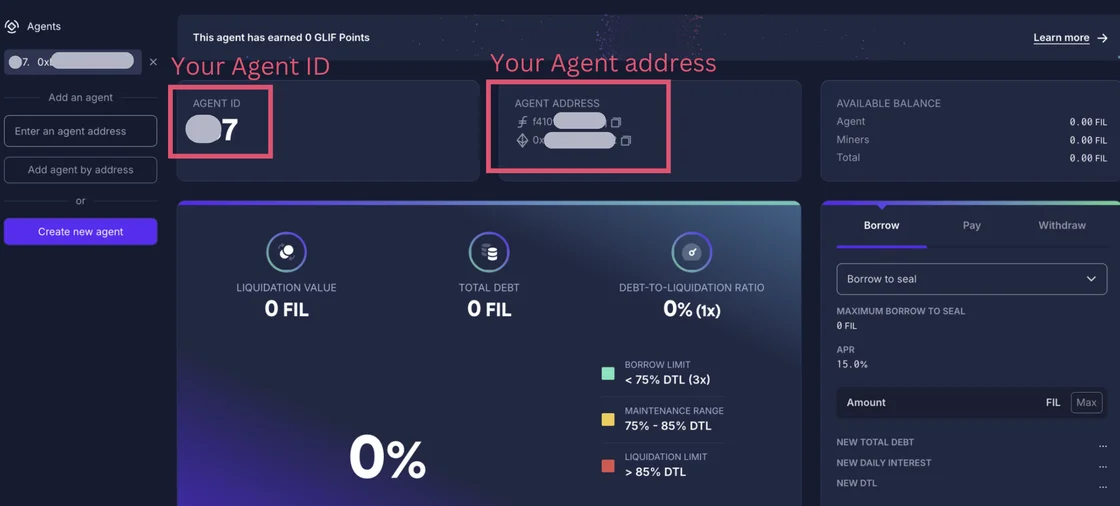
Step 6 — Success! You can see we've created a new Agent.
Important Agent Information
A couple pieces of important information to note after creating your Agent:
- Agent ID — The Agent ID is a number that GLIF uses internally in its smart contract infrastructure to identify your Agent.
- Agent f410 Address — The Agent f410 address is the smart contract address of your Agent, displayed in a Filecoin native format.
- Agent 0x Address — The Agent 0x address is another representation of the smart contract address of your Agent, dislayed in an Ethereum native format. An Agent's f410 and 0x addresses are functionally equivalent to each other.
- Agent Owner — The Agent Owner is the multisig wallet that owns your Agent smart contract, which we created at the beginning of this tutorial.
- Agent Operator — the Agent Operator, to change this address, please refer to Part 9 of this tutorial.
Next Steps
Congratulations! You just created your GLIF Agent. To recap, in Part 2 of this tutorial, you should have:
- Created a new Agent Owner multisig wallet, using your FilSnap wallet and 2 Ledger wallets or buner wallet addresses as signers
- Created a new Agent smart contract
In Part 3 of this tutorial, we will show you how to add miners to your Agent.
Join our community!
- 📢 Stay informed with updates on our blog and X (Twitter)
- 🤝 Connect with us through Discord and Telegram for support and partnerships
- 💬 If you encounter any difficulties, please open a Discord support ticket
- ⚠️ Beware of scammers! GLIF team members have the role “GLIF” or “Moderator”